This is pretty glitchy, but it is only my first attempt at character animation.
Wednesday, 12 May 2010
Extras
 I used after effects so I could not only put my videos together but also make sure the timing of each part of the video was efficient so I could fit my animation into a 35 second video so it would meet the assignment specification.
I put the videos together cut, stretched and compressed them to make my final render.
 I discovered a new technique which is using Auto IK which is found in the editing buttons for the armatures. This allows your puppet to move in a more realistic way, which I did not need for my main sequence but I used this to make an extra video.
You can also go into edit mode and select the main bones and click Co which connects the armature to a parent, this helps the right bones move when other bones do. Experimentation is the best way to find the movements you are looking for.
Unfortunately I only discovered some of the techniques for speeding up render times towards then end when my assignment was almost finished so it did not benefit me that much.
Key learning points:
- It is best to animate using bones. (Use Auto IK and Co)
- Make sure to use enough bones.
- Keep vertice counts as low as possible, you can always set smooth or subsurf later.
- Keep a standard key frame rate for all animations, you can always edit afterwards in software such as after effects.
- Always remember to test animations.
- Come out of edit mode before animating!
- Keep key frames spread out.
- Use exaggeration and preparation techniques.
Frames
To fix the problem what I had to do was extend my animation past the point where all the particles had died and then render one of those frames, when I went back and rendered before the particles come to life now there are no particles rendering. But I thought right thats fine now so I shortened my animation again the same problem occured as before, so I am going to have to leave it longer and cut the end off in video editing software.

I am man, I make FIRE
After struggerling for a very long time trying to get the fire to work, the reason being that the particels were not riseing no matter what I tried, it seemed hopeless. I then realised that you have to make sure that the bake setting (frames) match the particle settings!
I found this tutorial, it was very helpful and very straight forward:
To begin with I was goin to have the man himself emit fire, but that proved difficult because you have to change the material to look like fire which would make the wooden man look like fire before he should, so I just used a plane instead which I put inside the man.
Here are the settings I used:

The next problem I encountered was that the fire particles were rendering too early even though they did not start to emit until the correct frame, there was a still image of them before hand.
Tuesday, 11 May 2010
Drumming sequence
 First I had to do alot more posing and weightpainting to get my drummer into position and ready to be animated, it can be quite tricky to weight paint all the areas you want and only those areas. But it is very useful that you can do weight painting in wire frame mode so you can see exactly what you are doing to your puppet without having to take it out of the environment you want to animate it in.
This has taken a lot longer than I originally expected and not just because animation is a long winded process but because I could not get the particle effect to work the way I liked. Even though I have made convincing fire in the past, I could not get it to work this time even when copying my previous work.
Mechanical Drummer
I took what I had learnt from the weight paint / armature tutorials and implemented it for my assignment.

 For my assignment I wanted to have my wooden man playing the drums. So I went back to the original file and made armatures so my man has a skeleton, I then quickly made this short animation of him waving. I did not weight paint the whole body, just each arm for movement because he needs to look mechanical as he is not a real human, just a moving wooden ornament.
I did this by moving the bones and using key frame animation. For my assignment I think I will use some particel effects for an exciting finale.
Wiggerly Whale
http://www.blender3dclub.com/index.php?name=News&file=article&sid=21&theme=Printer
http://www.blender3dclub.com/index.php?name=News&file=article&sid=24&theme=Printer
I used these two tutorials, to create bones and weight paint a very simple whale type mech I created by extruding a cube.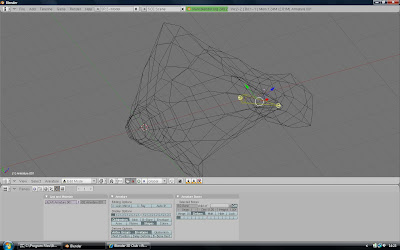
Steps:
http://www.blender3dclub.com/index.php?name=News&file=article&sid=24&theme=Printer
I used these two tutorials, to create bones and weight paint a very simple whale type mech I created by extruding a cube.

Steps:
- Create your mesh, with vertices in sensible positions for adding bones. Keep mesh simple.
- Add armature, position your first armature.
- In grab/edit mode you can menouvre and extrude armatures until you have a full skeleton.
- Then select the mesh first then the skeleton, Ctrl + P to parent the mesh to the bones and select the bones weight option.


- In pose mode select the first bone you wish to weight paint.
- Then select the mesh and go into weight paint mode.
- Do this for each area of the mesh.
- You can test while you are doing it by pressing 'G' or 'R' to move or rotate your bones and see how the mesh will react.
Monday, 10 May 2010
Waterfall

I decided that I would use what I had learnt from when I made the pouring blood animation to make a waterfall in my assignment animation. I copied the material I used for the river and put a sphere at the end where the waterfall would be.
The domain is a cube as per usual, the cube is what you edit to make look like water. I set smooth and added sub surf, you do not need to worry about the sphere. I also made sure to put the camera in a good position and got rid of any objects that were not in the shot, to save on render times. I discovered a new window/technique which you can see in the picture, which allows you to add or remove objects from the render, this is much easier than deleting objects and means you can get them back as and when you need them.
It took me a pretty long time to get the waterfall to look decent, through trial and error of settings of the fluid and the material. Luckily it did not take too long to bake each time. I set the fluid settings of the sphere to inflow, and set Z-0.4 (gravity) and X0.2 for flow of water, I was pleased with the end result I got. It does not look overly realistic but it matches the style of the rest of my external scene.
These are the material settings for the cube/water:

As I am limited to 30 seconds I am going to have to try and fit a lot of different animation techniques into a very small space of time. I think I have done enough with my external scene now and I should move onto to animating the internal scene. I will try some different camera movements, particle effects, and maybe see what I can do using the physics/game engine.
I also think it will be cool to add some different transitions rather than just a continuous camera fly.
Assessment 2

Today I began work on my second 3D assignment, this time it is for animation rather than modelling.
The task is to create a 30 second fly through video of my original assignment model from last semester, including animations to demonstrate what I have learnt during the term.
I began by trying to get the render times down on my assignment because, they were far too long, it was ok for modelling last term becaue it only had to render a few times, now it will have to render hundreds of frames for an animation, so it would have take way too long to create an animation in the state it was in.
There are many ways of speeding up renders, basically you have to remove detail to keep things as simple as possible:
- No particle effects
- No textures
- No Mirror
- No Transparacny
- No Nor
- No emitters
- No lights
- No subsurf
- Objects have as few vertices as possible, do this by removing subsurf, removing doubles, re-calculate normals, and try merging the object at the center.
- Turn ss off in render buttons
- Use decimate modifier to remove vertices from models
- Remove ambient lighting
I than began on my animation, I am starting with the external scene, the camera flies in and looks around, the teddy bear falls over, the flowers move around a bit and the ducks swim around, then the camera looks up to the sky ready for the next part of my animation.
I am going to animate my video in parts to save on render times, so the only objexts needed are the ones on camera because less objects means faster renders. I will then edit my videos together in sequence in windows movie maker.
So far I have only used key frame animation on the objects, camera and lights. But I will try to implement all the animation techniques I have learnt in class and hopefully a couple of new one s.
s.
Subscribe to:
Posts (Atom)
