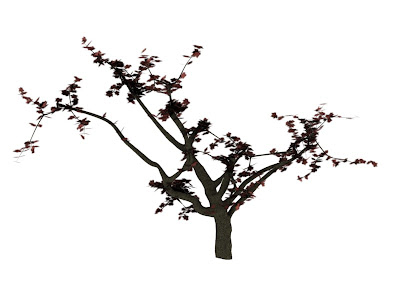
Continuing on from the tree tutorial is adding in the leaves and the bumpy effect on the trunk...
- Add plane.
- Move in edit mode so center point at bottom of plane.
- UV unwrap plane, add leaf texture.
- Then in textures load both leaf textures, same one again and the black and white one (second).
- Black and white: Col: off, Alpha: On(press twice so yellow), hit no RGB.
- On the material panel make aplpha zero
- On the links panel have Ztransp clicked = makes plane a leaf shape.
- With the original tree trunk selected click generate leaves.
- Name plane 'Leaf'.
- So name: leaf, size:0.1, press generate from selection. Now we have leaves but they are not so good just yet.
- Select plane, in edit mode turno it 90 degress counter clockwise, then back in edit mode rotate it back 90 degrees clockwise. This means the leaves will point towards the sky just like leaves in real life, so they can abosorb as much sun light as possible.
- Add new texture to the tree, clouds, noise size: 0.3, depth:0.
- In material panels/buttons turn the texture off because we don't want to see it.
- Add displacement modifier to tree, write name of texture, strenfth: 0.05 (experiment with this).
- But effects whole tree at the moment, need to only effect tree trunk and start of branches because branches will not look right.
- To choose the areas it will effect and how much by I used weight painting, so in that mode turn subsurf off for the moment so not too slow the process down, set weight: 1, opacity: 1/2, size: 40, hit Spray.
- Blue are the un-effected areas and red are the most effected areas.
- So make the trunk red and the start of the branches blue/green.
- Go to displacement, type ine group 'Group', so now twigs should be normal but the trunk still looks messed up/bumpy/slightly deformed much like a real tree.
- To change the colour of the leaves which I did because the texture is yellow, and you can see in the picture the leaves are red and in my next post they are gree, use mode editing mode...
- On the leaf texture click nodes, then enter node editing mode.
- Hit texture nodes
- Click Add>Input>Image
- Load Leaf
- Add>Colour>Colour boxes
- Change Hue for colour and saturation for brightness.

No comments:
Post a Comment